Saved Filter Views
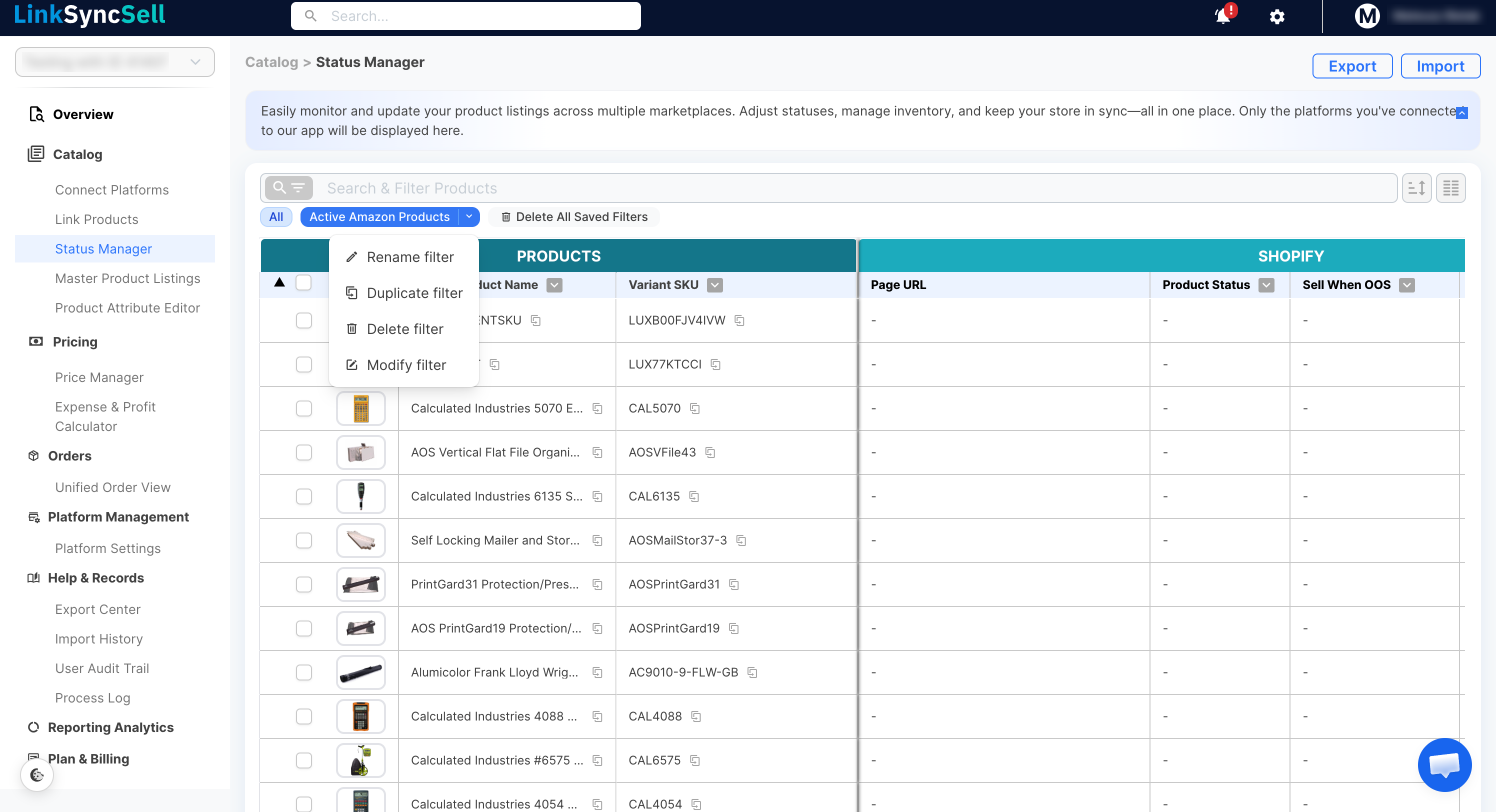
Overview
If you find yourself applying the same combination of filters again and again, say, "all active TikTok Shop listings" or "everything on Shopify that's sold out", you can save that combination as a named Saved Filter View. Saved views let you jump back to a specific slice of your catalog with a single click, instead of rebuilding the same filters every time.
Saved Filter Views appear as a row of buttons above the Status Manager table. The default view shows everything; each additional button is a view you (or a teammate) have saved.
Creating a Saved Filter View
- Open the Status Manager (Catalog > Status Manager).
- Apply the search terms and filters you want, for example, filter to a specific platform and status.
- Save the current filter combination as a view and give it a clear, descriptive name (for example, "Active TikTok" or "Shopify Sold Out").
- The saved view now appears as its own button in the row above the table.
Switching Between Views
Click any saved view button above the table to instantly apply that view's filters. Click the default (all) view to clear back to your full catalog.
Duplicating and Renaming Views
You can duplicate an existing view to use it as a starting point for a similar one. A duplicated view appears with a "(copy)" label so you can tell it apart, then adjust its filters and rename it. This is handy when two views are mostly the same except for one filter (for example, the same setup for two different platforms).
Deleting Views
To clear out views you no longer use, use the Delete All Saved Filters option above the table. This removes your saved views and leaves you with the default (all) view.
